Recent Posts

This is default featured post 1 title

Go to Blogger edit html and find these sentences.Now replace these sentences with your own descriptions.This theme is Bloggerized by Lasantha Bandara - Premiumbloggertemplates.com.

This is default featured post 2 title

Go to Blogger edit html and find these sentences.Now replace these sentences with your own descriptions.This theme is Bloggerized by Lasantha Bandara - Premiumbloggertemplates.com.

This is default featured post 3 title

Go to Blogger edit html and find these sentences.Now replace these sentences with your own descriptions.This theme is Bloggerized by Lasantha Bandara - Premiumbloggertemplates.com.

This is default featured post 4 title

Go to Blogger edit html and find these sentences.Now replace these sentences with your own descriptions.This theme is Bloggerized by Lasantha Bandara - Premiumbloggertemplates.com.

This is default featured post 5 title

Go to Blogger edit html and find these sentences.Now replace these sentences with your own descriptions.This theme is Bloggerized by Lasantha Bandara - Premiumbloggertemplates.com.

Thursday, April 12, 2012

Insert Images in Dreamweaver CS4


Now it is time to insert the logo image into the header div using Dreamweaver CS4.
  • Select and delete the default text that is inserted by Dreamweaver when creating a div ‘Content for id “header” Goes Here’.
  • Insert > Image > browse and select the logo image.
  • In the screen that appears, enter alternate text describing the image. e.g. BusinessSite Logo. Click OK.
    Insert Images in Dreamweaver CS4
  • You will see the logo image appearing within the ‘header’ div.
    Insert Images in Dreamweaver CS4
We have now completed the header portion of the template.


2. Goto "Start Menu" tab and select "Classic Start menu".
3. Click on "Customize" button and make sure "Display Log off" option is enabled. Now apply it.
Now click on Start button and select "Log off". Oops, It didn't ask for confirmation.
Classic_Log_off_bug_in_vista.jpg
In earlier versions of windows, it used to confirm the action. It was quite useful. Lots of time people can accidentally click on "Log off" but since it asks for confirmation, we can simply click on "No" button.
But in Vista, it doesn't confirm and logs out you from Windows. if you clicked on it by mistake then you'll loose all your opened documents (if not saved), you'll loose all your opened websites in browser.
Its really a stupid bug and I can't understand why the developers disabled it?

Cara Install Windows XP pada harddisk SATA dengan bantuan nlite

Jika komputer (pc/laptop) anda menggunakan harddisk type SATA dan memilih untuk menginstal Operating System Windows XP, kemungkinan pada saat anda menginstall windows XP belum bisa mengenali Harddisk SATA tersebut, tetapi hardisk anda dapat dikenali oleh bios, jika hal ini terjadi maka anda harus menginjeksikan driver sata komputer anda ke dalam file windows installer. Biasanya file driver sata sudah ada dalam cd driver notebook/mainboard yang anda peroleh pada saat anda membeli komputer.(jika cd ini tidak ada mintalah ke penjual komputer anda).


Jika driver satanya tidak ada di cd tersebut, anda bisa mencari di situs pembuat komputer anda, Pada situs tersebut masuk ke tab driver, kemudian lakukan browse dan gunakan kata kunci sesuai spesifikasi komputer anda. Untuk notebook gunakan kode atau seri notebook anda :
misal: (laptop) Acer Travelmate 6291, (Pc) gunakan type dan seri mainboard misal : Gigabyte GA-P31-S3G

Keterangan: Dari pengalaman pribadi, beberapa komputer atau notebook sekarang ada yang tdk perlu melakukan injeksi driver sata, misalnya notebook acer type terbaru rata2 tdk membutuhkan driver sata, hanya perlu melakukan pengaturan interface hardisk pada bios, jika ingin menginstal windows XP maka ubah interface hardisk ke IDE, jika ingin instal windows vista ubah setting interface hardisk ke ACHI.

Setelah anda memperoleh driver sata komputer anda, yang anda perlu lakukan hanya melakukan injeksi driver sata tersebut

Software untuk menginjeksi driver sata ke windows installer adalah nlite (merupakan software freware), anda bisa mendownload software tsb di situs : http://www.nliteos.com atau http://www.nliteos.com/download.html


Setelah terdownload, coba instal nlite, jika tidak bisa terinstal biasanya di komputer anda perlu diinstal service pack windows XP, yaitu NET Framework 2.0
dapat anda download di:
http://www.nliteos.com/download.html , http://www.microsoft.com/downloads atau di http://www.microsoft.com/downloads/details.aspx?FamilyID=79bc3b77-e02c-4ad3-aacf-a7633f706ba5&DisplayLang=en

1. Langkah selanjutnya adalah memulai proses injeksi driver sata ke windows installer. Proses ini harus anda lakukan di komputer teman yang sudah aktif windowsnya.
Copy seluruh isi cd windows installer ke dalam hardisk, beri nama direktori misal:WinXPSP2
Kemudian jalankan program nlite


2. Klik Next


3. Klik Browse, arahkan ke direktori yang berisi file windows installer ( D:WinXPSP2)


4. Klik Next


5. Klik Next, maka akan muncul kotak dialog berikut:


6. Klik Driver dan Bootable ISO hingga tombolnya berwarna hijau
(Driver : untuk mengintegrasikan driver misal driver sata ke dalam wiindows installer, anda juga bisa memasukkan driver yg lain)
(Bootable ISO agar windows installer yang anda buat bisa booting secara otomatis pada saat telah dicopy ke CD)
Klik tombol Next


7. Pilih Multiple driver folder jika drivernya lebih dari satu, jika hanya satu file saja pilih single driver


8. Cari file yang berisi driver sata komputer anda, setelah ketemu kilk OK


9. Klik Ok


10. Klik OK


11. Klik Yes pada kotak dialog "Do you want to start the process?"


12. Klik Next (Anda sudah berhasil mengintegrasikan driver sata ke windows installer), selanjutnya anda akan membuat file ISO atau langsung diburning ke CD blank


13. Sekarang anda bisa membuat dulu ISOnya, atau langsung memburning ke CD blank. Masukkan CD ke CD RW Drive kemudian tekan tombol Burn,
Selamat anda sudah mempunyai file master windows installer buatan sendiri.

14. Langkah selajutnya adalah kembali ke komputer pertama anda, jalankan komputer dan atur setting bios agar booting dimulai dari CD ROM.

15. Silahkan anda melakukan instalasi file windows installer dengan CD tadi, ikuti instrkusinya, pasti tidak akan minta driver sata lagi dan hardisk sata anda sudah dapat dikenali oleh Windows XP (jika belum dikenali berarti masih ada file driver sata yang belum anda injeksikan ke windows installer, silahkan lakukan kembali prosedur 1 s/d 12 untuk memperbaikinya)

Semoga sukses.....!!!!!!

Classic Startmenu Log Off Command Confirmation Bug in Windows Vista


2. Goto "Start Menu" tab and select "Classic Start menu".
3. Click on "Customize" button and make sure "Display Log off" option is enabled. Now apply it.
Now click on Start button and select "Log off". Oops, It didn't ask for confirmation.
Classic_Log_off_bug_in_vista.jpg
In earlier versions of windows, it used to confirm the action. It was quite useful. Lots of time people can accidentally click on "Log off" but since it asks for confirmation, we can simply click on "No" button.
But in Vista, it doesn't confirm and logs out you from Windows. if you clicked on it by mistake then you'll loose all your opened documents (if not saved), you'll loose all your opened websites in browser.
Its really a stupid bug and I can't understand why the developers disabled it?

Add Customized Strings (OEM Information) in System Properties Dialog Box of Windows Vista and 7


With the help of this hack, you can get some extra information and a personalized logo in Vista and 7 System Properties dialog box. Its very much same as the good old "OEMLogo.bmp" and "OEMInfo.ini" files in windows XP but sadly this trick no longer works in Vista and 7. Here is a screenshot of Windows 7 System Properties dialog box with customized strings:


So here we go:
1. Type regedit in RUN dialog box and press Enter. Now goto:
HKEY_LOCAL_MACHINE\SOFTWARE\Microsoft\Windows\CurrentVersion
Under this key, look for a key OEMInformation. If it doesn't exist, create it.
2. Now select OEMInformation key and in right-side pane, create following String values and set their values as shown below:
Logo - path_of_OEMlogo.bmp_file
Manufacturer - Any_desired_name
Model - Any_desired_name
SupportHours - Any_desired_time_amount_like_24x7
SupportPhone - Any_desired_phone_number
SupportURL - Any_desired_URL
NOTE: OEMlogo.bmp file should be 96x96 in size and can be placed at any location.
3. Now open System Properties by right-clicking on My Computer icon on desktop and select Properties, you'll see your desired entries in "System" section and another section will also be created with the same name as you entered in Manufacturer String value. The OEMlogo.bmp file will be shown in right-side of "System" section.
NOTE: Windows 98, Me, 2000, XP or Server 2003 users, visit this tutorial.

Office 2010 RTM Now Available For TechNet & MSDN Subscribers


Users who been running the beta version of Office 2010, which was released back in November 2009, need to uninstall it before installing Office 2010 RTM. Both x86 and x64 versions of Office Professional Plus are available for download.
Office 2010 free download
You can download Office 2010 free Product Guide to know more about Office 2010 features. Make sure that your system meets Office 2010 system requirements before installing it. So, enjoy your free copy of Office 2010!
Download Office 2010

Free Wordpress Theme 2011


Berikut aku ingin berbagi theme-theme keren untuk blog Wordpress. Barangkali saja ada teman-teman yang sedang mencari theme atau template gratis Wordpress semoga koleksi dibawah ini bisa memberi solusi untuk menemukan template terbaik bagi blog Wordpress nya.


Ok berikut list theme keren untuk Blog Wordpress, semua gratis :D :

1. Coffe Desk


Demo download


2. Modern Interior


Demo download


3. Sleek Kitchen


Demo download


4. Red Light

Demo download


5. Blue Light


Demo download


6. Real Estate Info


Demo download


7. Letter Frame


Demo download


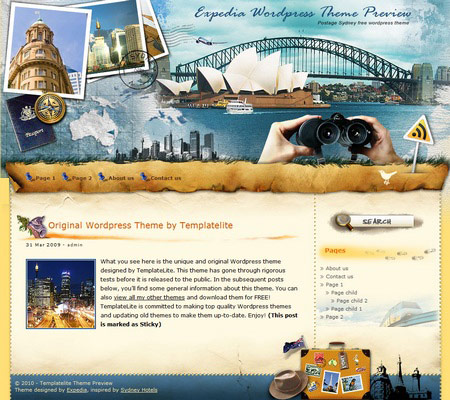
8. Postage Sidney

Demo download


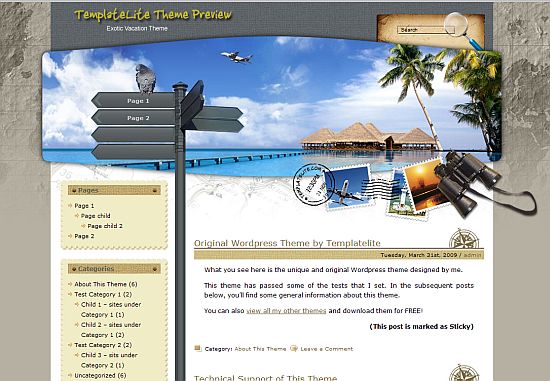
9. Exotic Vacation


Demo download


10. Morning After

Demo download


10. Magster


Demo download


11. Silva


Demo download


12. Iris


Demo download


13. Garden of Orchids


Demo download


14. Bitter Sweet


Demo download


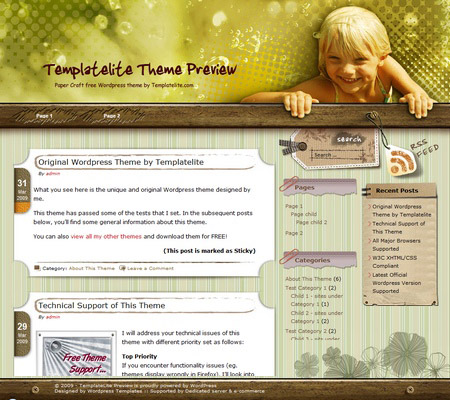
15. Papercraft


Demo download


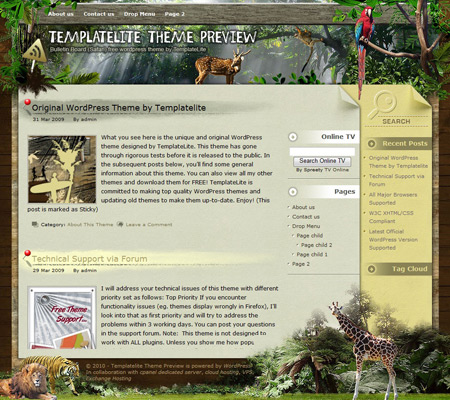
16. Buletin Board


Demo download


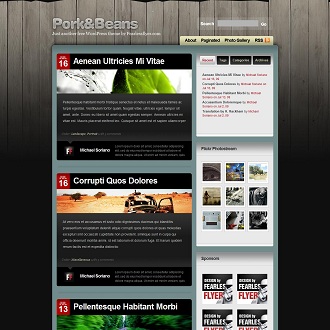
17. Pork and Bean


Demo download

18. Fresh and Clean


Demo download

19. Ink Stain


Demo download

20. Heavenly Blue


Demo download

Share

Twitter Delicious Facebook Digg Stumbleupon Favorites More